Software
9.11.2.0 and higherLösung
You must first check the Requirements and then you can create the backup set that:
- Runs on a computer/server using the client software.
- Runs on the backup server as cloud2cloud without the needing a pc/server.
Requirements
License/module
The Microsoft 365 Backup requires a module per mailbox/account that you must first add to your backup account before you can create the Microsoft 365 backup set.
Microsoft Microsoft 365 abonnement
Only the following plans are supported:
| Microsoft 365 Business | Microsoft 365 Business Essentials |
| Microsoft 365 Business Premium | Microsoft 365 Enterprise E1 |
| Microsoft 365 Enterprise E3 | Microsoft 365 Enterprise E4 |
| Microsoft 365 Enterprise E5 | Microsoft 365 Education |
| Microsoft 365 Basic | Microsoft 365 Personal |
| Microsoft 365 Family Plan | Microsoft Outlook Free account |
Global Admin Role
Starting with 8.3.6.0 or above, the Microsoft 365 account used for authentication must have Global Admin Role, since Modern Authentication will be used.
This is to ensure that the authorization configuration requirements will be fulfilled (e.g. connect to Microsoft Azure AD to obtain the App Access Token). To assign the role, please refer to Zuweisen einer globalen Administratorrolle zu Konten.
Term Store Administrator Role
The Term Store Administrator Role may be required for backup and restore of SharePoint items. To assign the role, please refer to Gewähren der Administratorrolle für den Term Store.
Membership of Discovery Management security group
Please refer to Erteilen der Berechtigung für die Discovery Management Group for assigning the rights.
Backup über den Software-Client
- Start the software client.
- Logon into your account
- Go to Backup Sets.

- Click on Add.

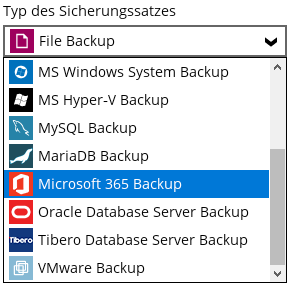
- As Backup set type choose Microsoft 365 Backup.
- Fill in the Microsoft 365 credentials and click Test to check if they are correct.
- You can create a set per MS365 account by providing the credentials for a single MS365 account at this point
- You can also provide the credentials of a administrator to backup multiple MS365 accounts at once.
- If you get this error, MFA is on and you must generate an app password.

- After the test has been completed successfully, you can click on Next.
- You will now be given a choice of which parts of your Microsoft 365 environment you want to backup:
- Outlook
- OneDrive
- Personal Site
- Public Folders
- Site Collections
- Teams
You can of course also enable or disable individual parts of MS365 accounts via the link "I would like to choose the items to backup".
- When you are done with the backup selection you can go back to the next step, the backup schedule.
- The schedule is off by default. If you want the backup to start automatically according to a schedule, you must change the slider from
 to
to 
- After this you can add a schedule via

Remark: Don't forget to enable "Run retention policy after backup" so that retention is also cleaned up.
- The schedule is off by default. If you want the backup to start automatically according to a schedule, you must change the slider from
- After setting the schedule you can go back to the next step, Destination
- The default destination is the online backup server. You can also add a local destination, for example.
To delete a destination: Double click on the destination and choose delete at the bottom left
- The default destination is the online backup server. You can also add a local destination, for example.
- After setting the destination, you can go back to the next step, Encryption.
- Choose your encryption settings. Default = 44 character machine generated key.
Remark: Always keep the encryption key somewhere safe, because without this key you can no longer access your backup! - Confirm that you have written down the key.
- Choose your encryption settings. Default = 44 character machine generated key.
- Done, you can now click on close at the bottom right if you want to change things in the backup set or Backup now if you want to start the backup immediately.
Backup über den Server (cloud2cloud)
- Go to the backup server of the backup account (e.g. backup07.mindtimebackup.de)
- Login on your backup account
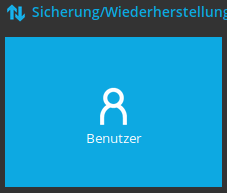
- Go to the user section
- Go to the Backup set option in the left menu
- Click on the
 to add a new backup set
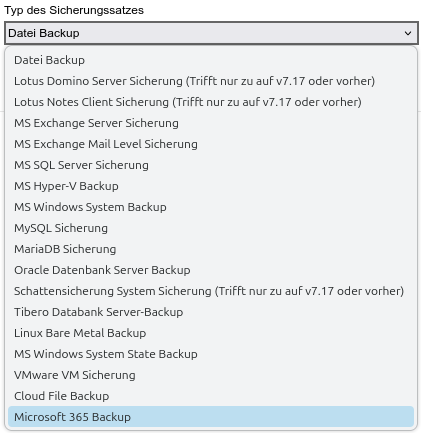
 - Choose the Backup set type Microsoft 365 Backup
- Give the backup set a clear name
- For "Run on" there are 2 options: Server, Client
- Choose Server so the set will be run on the backup server.
(This cannot be changed after the set is created!) - Client is for when you want to install the Pro software on your PC/Server en does not apply in this case.
- Choose Server so the set will be run on the backup server.
Modern authentication
- Leave the username, password and app password field blank.
- Click Test.
- Log in directly to Microsoft and authorize the backup
- Copy the authorization code and paste it in the popup on the backup server.

- Click OK.
From this point on, the steps are the same regardless of the authorization method
- You will now get a selection of items in the Microsoft 365 environment which you can backup
- Outlook
- OneDrive
- Personal Site
- Public Folders
- Site Collections
- Teams
You can also use the link "I would like to choose the items to backup" to select or de-select individual items or users from the list.
- After the selection is done you can continue to the next step
 backup schedule.
- By default the schedule is disabled. In case the backup server needs to start the backup according to schedule you need to change the slide at the top right from
 to
to 
- After this you can use to add a schedule
Caution: Don't forget to enable the "Run Retention Policy after backup" so the retention will actually be removed from the account
- By default the schedule is disabled. In case the backup server needs to start the backup according to schedule you need to change the slide at the top right from
- After creating the schedule you can continue to the next step Encryption
- Cloud2cloud backups are the exception of our default rule of not having the encryption key. For the server to do his work it needs to have the encryption key. The server will download the content of the mailbox(es) to a temporary directory on itself where the data will be encrypted and compressed before being stored in the users account.
- For this the server needs the encryption key but it is not visible for us as the admin, only the user can see the key itself!
- Done, you can now use
 in the bottom right to store the backup set