Software
9.9 and higherProblem
You want to backup data from another cloud service without having to use a local computer to do so.
Note: If you want to create a OneDrive set and an Microsoft 365 set, it is better to turn it on in the Office 365 backup instead of creating a separate OneDrive backup set.
Solution
You can create backups for various cloud services using the backup server so a local computer to run the backup is not needed.Check www.mindtimebackup.com for the current list of supported cloud services.
- Go to the backup server of the account (e.g. backup09.mindtime.nl)
- Login on your account
- Go to the user section
- Go to the Backup set option in the left menu
- You will see a list of backup sets in the account
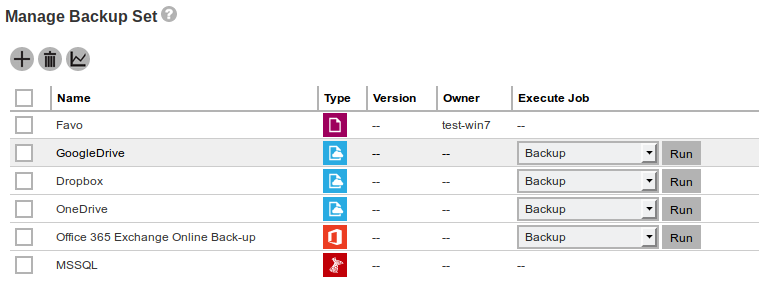
You can see right away which sets are run on the server by the options in the "Execute Job" column. These are only present when the set can be managed online. - Click on the
 on top of the list to add a new backup set
 - First choose the Type "Cloud File Backup"
- Give the backup set a clear name
- For "Run on" there are 2 options: Server, Client
- Choose Server so the set will be run on the backup server.
(This cannot be changed after the set is created!)
- Choose Server so the set will be run on the backup server.
- Use Backup From to select the cloud service from which the backup should be made
- Depending on the service you will see 2 possible login options:
- Fields for login credentials to the service
- You can use these to supply login credentials for the service
- a "Test" button
- The Test button will open a new page/tab allowing you to login to the service to get a authorization code.
Caution: Popup blockers can block opening the new page/tab.
After clicking the button a field to provide the authorization code will appear.
- The Test button will open a new page/tab allowing you to login to the service to get a authorization code.
- Fields for login credentials to the service
- After logging in/proving to login information for the service you can continue to the next step
 (bottom right) backup source
 - Here you can make a selection of which data should be back-upped
- After the selection is done you can continue to the next step backup schedule.
- Bij default the schedule is disabled. In case the backup server needs to start the backup according to schedule you need to change the slide at the top right from
 to
to 
- After this you can use to add a schedule
Caution: Don't forget to enable the "Run Retention Policy after backup" so the retention will actually be removed from the account
- Bij default the schedule is disabled. In case the backup server needs to start the backup according to schedule you need to change the slide at the top right from
- After creating the schedule you can continue to the next step Encryption
- Cloud2cloud backups are the exception of our default rule of not having the encryption key. For the server to do his work it needs to have the encryption key. The server will download the content of the cloud service to a temporary directory on itself where the data will be encrypted and compressed before being stored in the users account.
- For this the server needs the encryption key but it is not visible for us as the admin, only the user can see the key itself!
- Done, you can now use
 in the bottom right to store the backup set